What is a BJT Transistor?
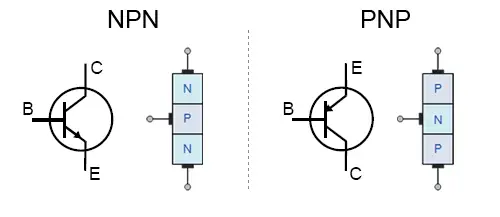
A BJT (Bipolar Junction Transistor) is an electronic component that acts as a current amplifier or an electrically controlled switch.
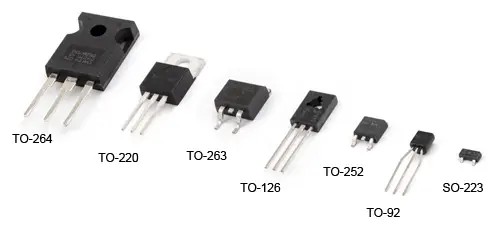
Common packages for BJTs include TO-92 and TO-220, with the latter offering better heat dissipation.
How Does a BJT Transistor Work?
BJT transistors operate by controlling the current between the collector and emitter using a smaller current at the base terminal.
They have three operating modes: Cut-off, Saturation, and Active. For Arduino, we use Cut-off and Saturation modes to control loads.
Connection Diagram
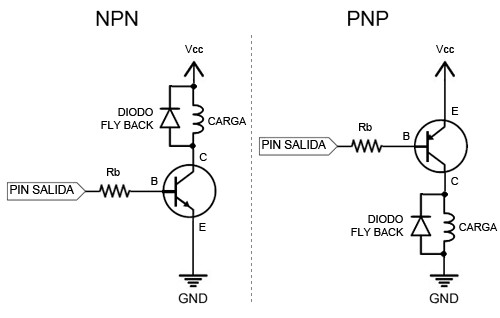
BJT transistors can be connected in various configurations. For Arduino, the common emitter configuration is preferred for switching applications.
Using Inductive Loads
When using inductive loads like motors or relays, add a flyback diode to protect the transistor and Arduino from voltage spikes.
Calculating Base Resistor
The base resistor ensures the transistor operates in the correct region. It is calculated using the transistor's hFE, Vbe, and load current.
Example Code
// Example code for controlling a load with Arduino and BJT transistor
const int loadPin = 9;

void setup() {
    pinMode(loadPin, OUTPUT);
}

void loop() {
    digitalWrite(loadPin, HIGH);
    delay(1000);
    digitalWrite(loadPin, LOW);
    delay(1000);
}
Conclusion
BJT transistors are a cost-effective way to handle higher power loads with Arduino. Remember to choose appropriate resistors and add protection components for reliable operation.