What is an Infrared Remote Control?
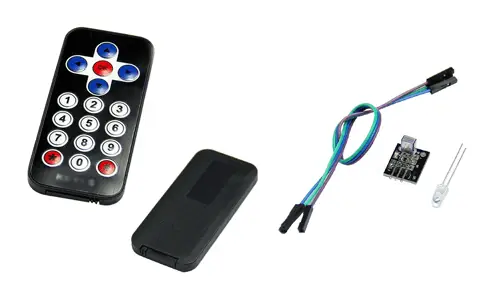
An infrared remote control uses an IR LED to send signals to a receiver. These signals can control devices like robots, vehicles, or even Arduino-based projects. Using light as the transmission medium, the control requires a direct line of sight with the receiver.
Price
Arduino-compatible infrared remote kits with HX1838 modules are inexpensive, priced around €0.75. Standalone receivers like the HX1838 cost as little as €0.10.

How Does an Infrared Remote Control Work?
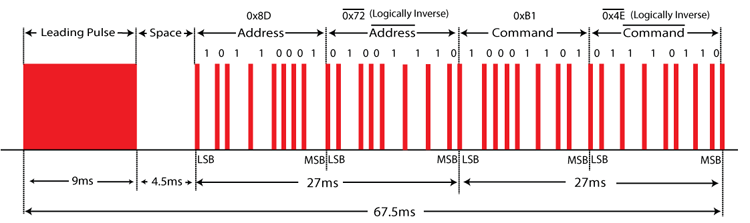
The remote sends modulated signals using a carrier wave, typically at 38 kHz, which helps distinguish the control signal from ambient noise. The common NEC protocol uses 8-bit addresses and commands with a 38 kHz carrier wave for transmission.
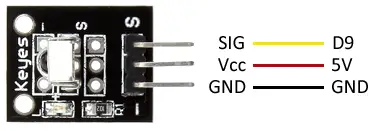
Connection Diagram
Connect the infrared receiver to Arduino as follows:
Code Examples
Basic Example: Displaying Received Signals
This example uses the Arduino-IRremote library to display received codes in hexadecimal format:
#include

const int RECV_PIN = 9;

IRrecv irrecv(RECV_PIN);
decode_results results;

void setup() {
  Serial.begin(9600);
  irrecv.enableIRIn();
}

void loop() {
  if (irrecv.decode(&results)) {
    Serial.println(results.value, HEX);
    irrecv.resume();
  }
}
Advanced Example: Recognizing Specific Keys
This example maps hexadecimal codes to specific actions:
#include

const int KEY_UP = 0xFF629D;
const int KEY_DOWN = 0xFFA857;
const int KEY_LEFT = 0xFF22DD;
const int KEY_RIGHT = 0xFFC23D;
const int KEY_OK = 0xFF02FD;

const int RECV_PIN = 9;

IRrecv irrecv(RECV_PIN);
decode_results results;

void setup() {
  Serial.begin(9600);
  irrecv.enableIRIn();
}

void loop() {
  if (irrecv.decode(&results)) {
    switch (results.value) {
      case KEY_UP:
        Serial.println("UP");
        break;
      case KEY_DOWN:
        Serial.println("DOWN");
        break;
      case KEY_LEFT:
        Serial.println("LEFT");
        break;
      case KEY_RIGHT:
        Serial.println("RIGHT");
        break;
      case KEY_OK:
        Serial.println("OK");
        break;
    }
    irrecv.resume();
  }
}