What is an I2C LCD Controller?
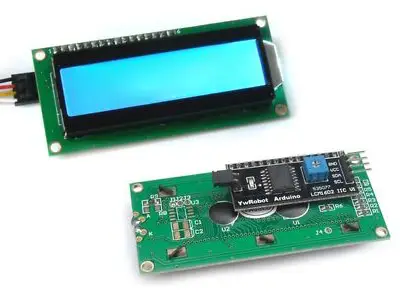
An I2C LCD controller allows you to control an LCD display using only two wires (SDA and SCL). It is an efficient alternative to directly controlling an LCD, which would otherwise require many pins from Arduino.
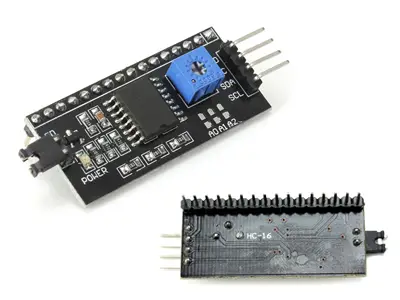
This controller is based on the PCF8574 I/O expander and includes a potentiometer to adjust the backlight.
Price
An I2C controller costs around €0.60, while an LCD display (16×2) costs €1.70 when purchased together. Larger LCDs (20×4) cost about €4.20.
Mounting Scheme
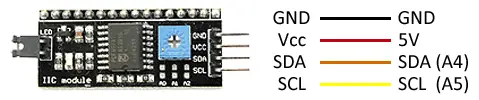
The connection is simple. Power the module with 5V and GND from Arduino, and connect the SDA and SCL pins:
- SDA: A4 (Arduino Uno/Nano)
- SCL: A5 (Arduino Uno/Nano)
Code Examples
Basic Example
The following code initializes the LCD and displays "Line 1" and "Line 2" on a 16×2 screen:
#include
#include

LiquidCrystal_I2C lcd(0x27, 16, 2);  // LCD at address 0x27, 16x2

void setup() {
    lcd.begin();                       // Initialize the LCD
    lcd.backlight();                   // Turn on the backlight
    lcd.setCursor(0, 0);               // Set cursor to the first line
    lcd.print("Line 1");               // Display "Line 1"
    lcd.setCursor(0, 1);               // Set cursor to the second line
    lcd.print("Line 2");               // Display "Line 2"
    delay(2500);                       // Wait for 2.5 seconds
    lcd.clear();                       // Clear the display
}

void loop() {
    // No additional actions in the loop
}